RG - The suspend / unsuspend commands ('Kill Switch')
Please note that the Suspend and Unsuspend commands can only be performed by Risk Managers that have been granted the authorization, i.e. that have been given the right profile by their MCA (Member Connect Administrator).
Suspend (‘Kill Switch’) a risk-monitored Member
- To suspend the entire trading activity of a risk-monitored member for its member code, do the following:
- In the Risk Controls Dashboard, click on the Killswitch button available at the Member Code level.

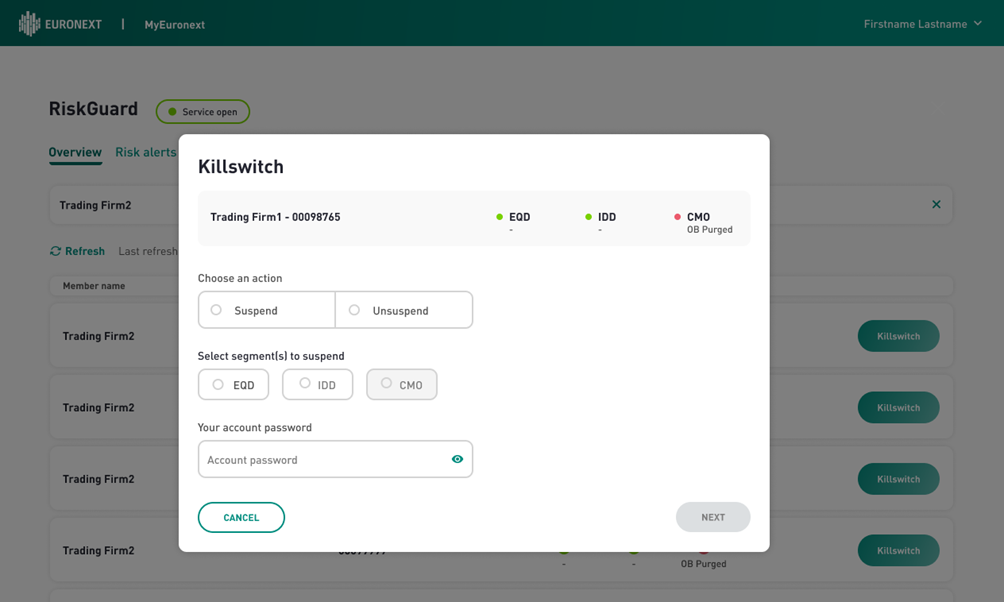
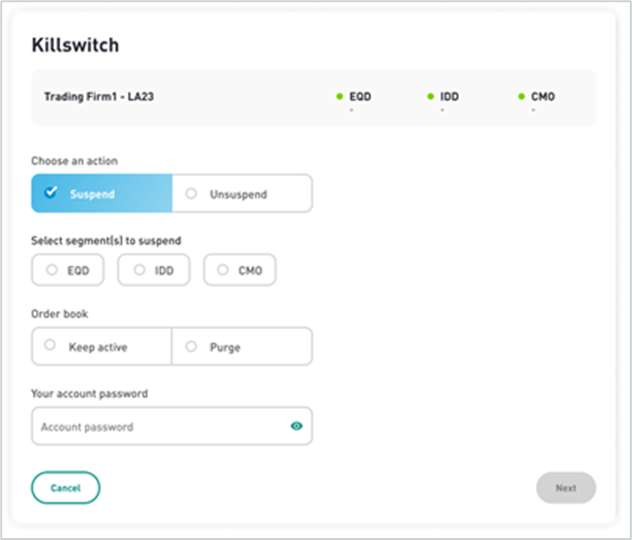
2. The following confirmation and validation dialog box appears:
3. The "Cancel" button allows you to close the dialog box and return to the screen previously consulted. The next button is greyed out.
4. The status provided for each Optiq segment on the top of the box indicates the Suspend status of the risk-monitored member before the Suspend command is triggered. As the Suspend is managed at Optiq segment level, it might be possible as per the screen below that the risk-monitored entity was previously suspended in a segment (in the example below, in the Commodities segment).
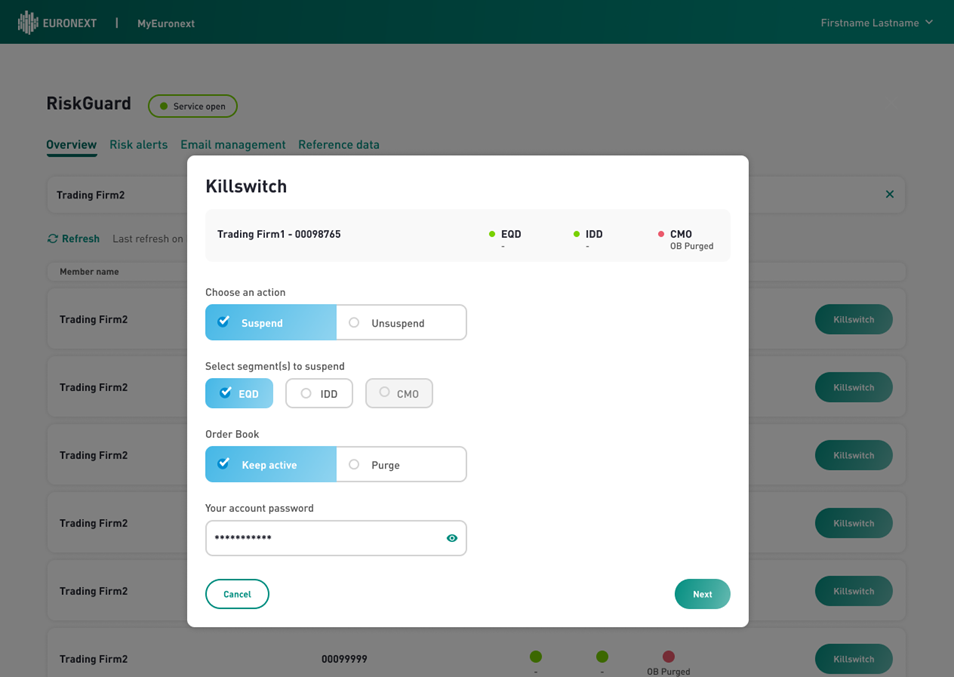
5. Click on the “Suspend” button and select the Optiq segment(s) on which the risk- monitored entity should be suspended. An Optiq segment appearing as Grey means that the entity has no trading or clearing right in that segment. The button will change from white to blue and a white check mark will appear to signify the suspension. To validate the suspension, enter your password. The password is the same as the password used to logon to the user interface. The "Next" button will then change from grey to green. Click on “Next” will validate the action.
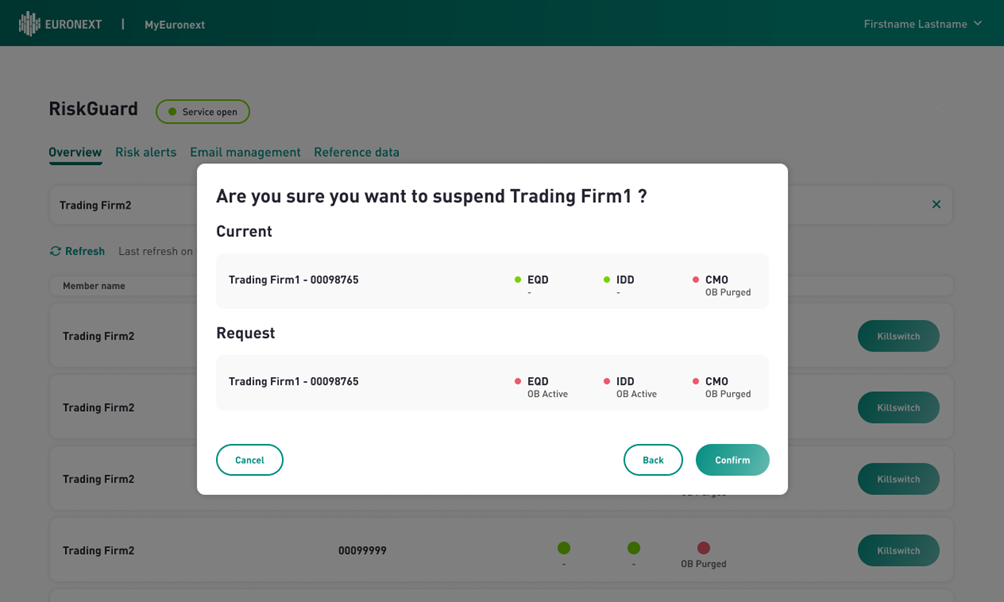
6. Click on “Next” to validate the command. A second pop-in will appear to confirm the suspension of the risk-monitored entity. The confirmation box allows you to view the details of the ‘Suspend’ operation’.
Click on "Confirm" to validate the action, on “Back” to return to the suspend screen or “Cancel” to cancel the operation.
7. Click on “Confirm” will result in the following:
- Suspend notifications are sent to the relevant Risk Managers of the Risk Member, and are also visible in the Risk Alert pane. The alerts notify Risk Managers of the success or the failure of the operation. Note that there will be one alert per Optiq segment on which the entity has been suspended.
- The status of the risk-monitored entity in the Risk Controls Dashboard is updated to reflect the successful suspension i.e. changes from green to red.
Note that in case of an unsuccessful Suspend operation, an alert is also returned with the rejection reason being provided in the ‘Comments’ column of the Alert pane.
Suspension at a Logical Access level
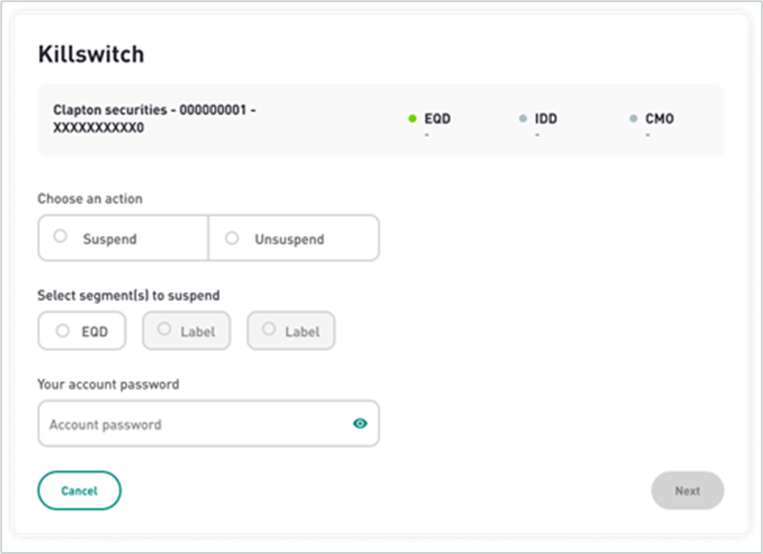
The Suspension follows the same logic as explained in the previous paragraphs. The only difference is the fact that a Logical Access is linked to an Optiq segment (in the figure above, EQD), therefore you are not requested to select any Optiq segment.
Suspension at a Short Code level
The Suspension follows the same logic as explained in the previous paragraphs. When suspending a short code you must select at least one Optiq segment (a short code is never associated to a particular Optiq segment).
Unsuspend a risk-monitored Member
- To unsuspend the entire trading activity of a risk-monitored entity at the Member Code, i.e. FirmID, level, do the following:
- In the Risk Controls Dashboard, click on the Killswitch button available at the Member Code level.

2. The following confirmation and validation dialog box appears:
The "Cancel" button allows you to close the dialog box and return to the screen previously consulted. The next button is greyed out.
The status provided for each Optiq segment on the top of the box indicates the Suspend status of the risk-monitored member before the Unsuspend command is triggered. As the Unsuspend is managed at Optiq segment level, it might be possible as per the screen below that the risk-monitored entity was previously unsuspended in a segment.
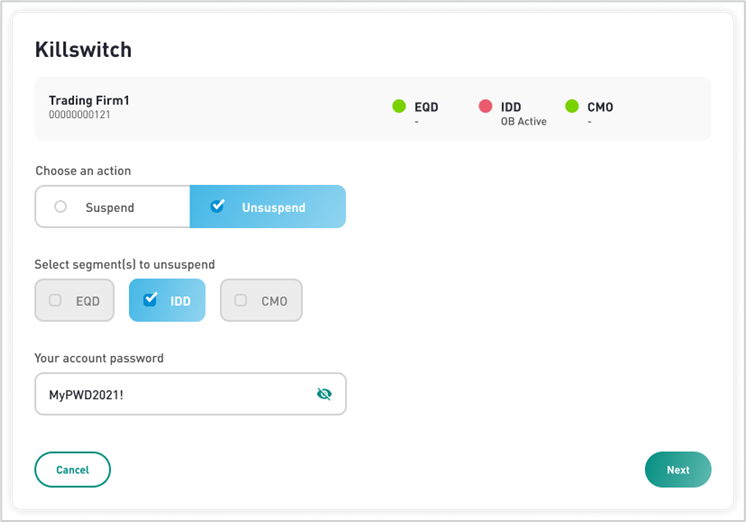
2. Click on the “Unsuspend” Button and select the right Optiq segment(s). The button will change from white to blue and a white check mark will appear to signify the suspension. To validate the unsuspension, enter your password. You must use the same password as the one used to logon to the interface. The "Next" button will then change from grey to green. Click on “Next” will validate the action.
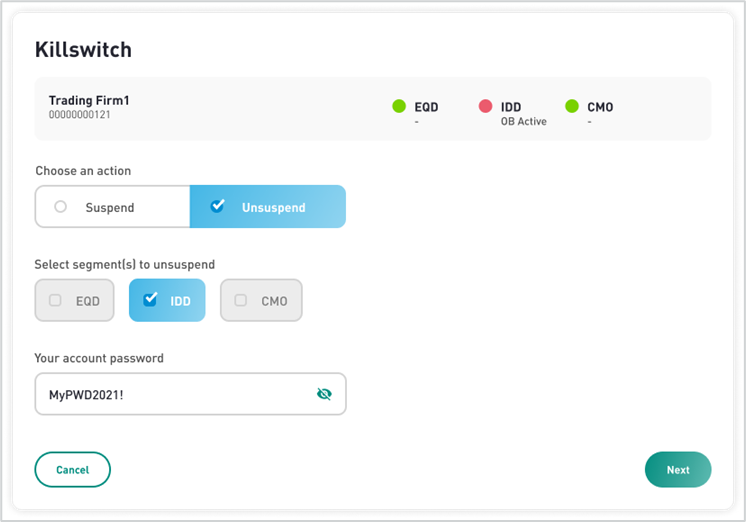
3. A second pop-in will appear to confirm the unsuspending of the firm. The confirmation box allows you to view the details of the ‘Unsuspend’ operation.
Click on "Confirm" to validate the action, on “Back” to return to the suspend screen or “Cancel” to cancel the operation.
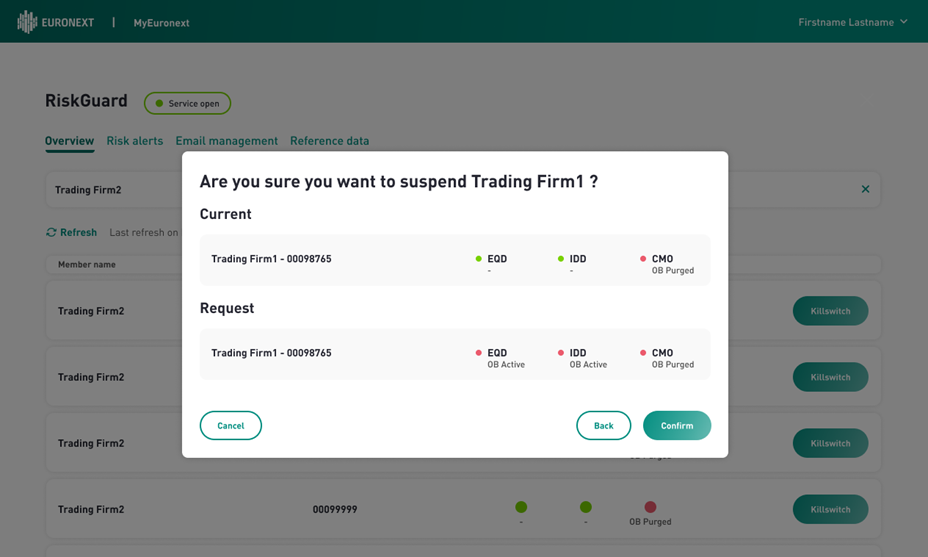
4. Click on Confirm will result in the following:
- Unsuspend notifications are sent to the relevant Risk Managers of the Risk Member, and are also visible in the Risk Alert pane. The alerts notify Risk Managers of the success or the failure of the operation. Note that there will be one alert per Optiq segment on which the entity has been unsuspended.
- The status of the risk-monitored entity in the Risk Controls Dashboard is updated to reflect the successful unsuspending i.e. changes from red to green.
Note that in case of an unsuccessful Unsuspend operation, an alert is also returned, the rejection reason being provided in the ‘Comments’ column of the Pending Alert pane.
Unsuspend at a Logical Access level
The Unsuspension follows the same logic as the Suspension at the Logical Access level i.e. no Optiq segment needs to be selected.
Unsuspend at a Short Code level
The Unsuspension follows the same logic as the Suspension at the short code level i.e. Risk Managers need to select the Optiq segment(s).
