SecDer Admission - Upload a Coupon Plan
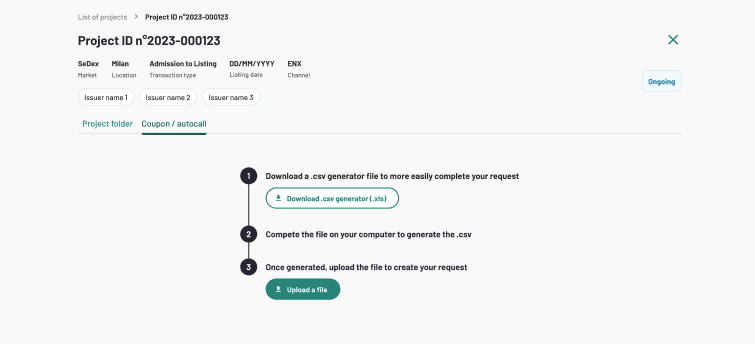
During a Listing Project, after uploading the Instrument Information, if the instruments need to be linked to a Coupon/autocall plan, you can click on the "Coupon/autocall" tab.
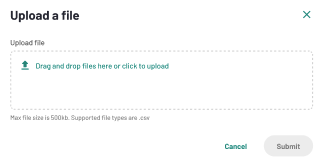
Download the .csv generator by clicking on the proper button. You can upload a file selecting it from your computer, or drag and drop the file in the proper space.
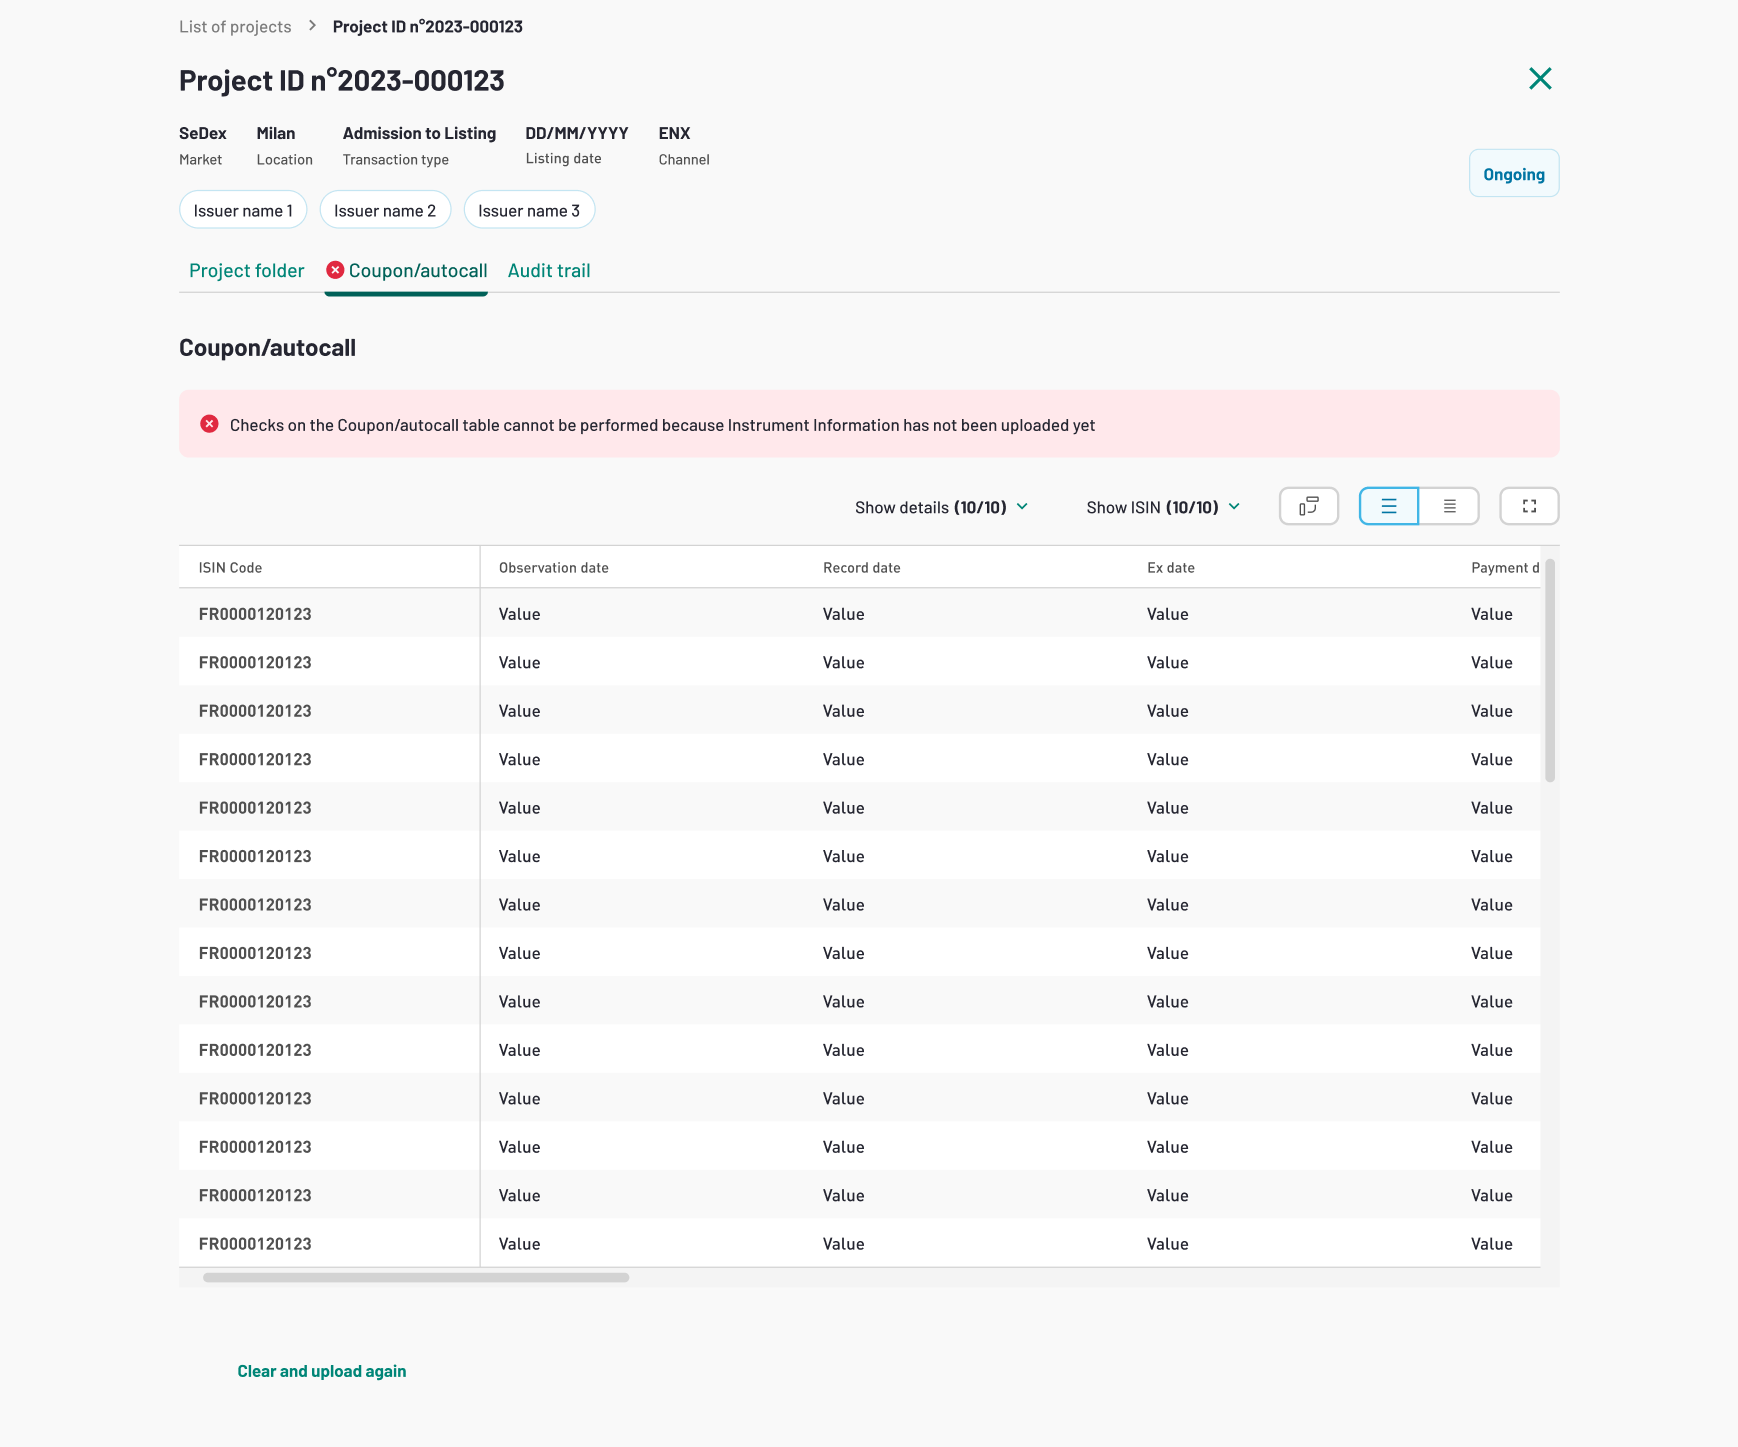
Please note that Instrument Information submission is required for the application to perform checks on the Coupon / autocall. If you click on the Coupon/autocall tab before the instrument submission, a banner will be displayed to highlight this precondition.
After uploading Coupon/autocall, the application will alert you about the need to calculate the Ex Date, as it is a required field.
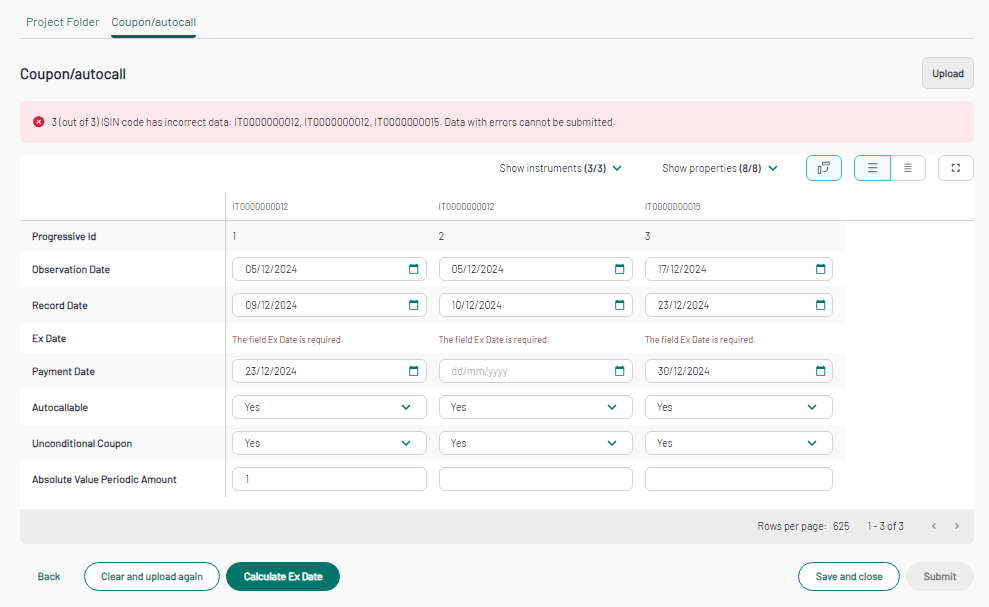
Calculate and Apply the Ex Date
Click on "Calculate Ex Date" button available on the bottom of the page, a light blue banner will report the following message "Ex Date calculation completed. Press Apply button to get the results.", and the "Apply Ex Date" button will appear.
By clicking on the "Apply Ex Date" button, a toaster will be displayed on top of the page, reporting the following message "Results applied to the form. Please remember to save the data.", and the Ex Date field will be populated (the field will be not editable).
"Save and close" can be used to save the complete form. If the Ex Date calculation was already performed, it will be saved and stored accordingly.
Please note that every time one of the dates in the table is modified after the initial calculation of the Ex Date, the calculation must be redone and applied (by clicking the appropriate buttons).
Submit the Coupon / autocall plan to Euronext
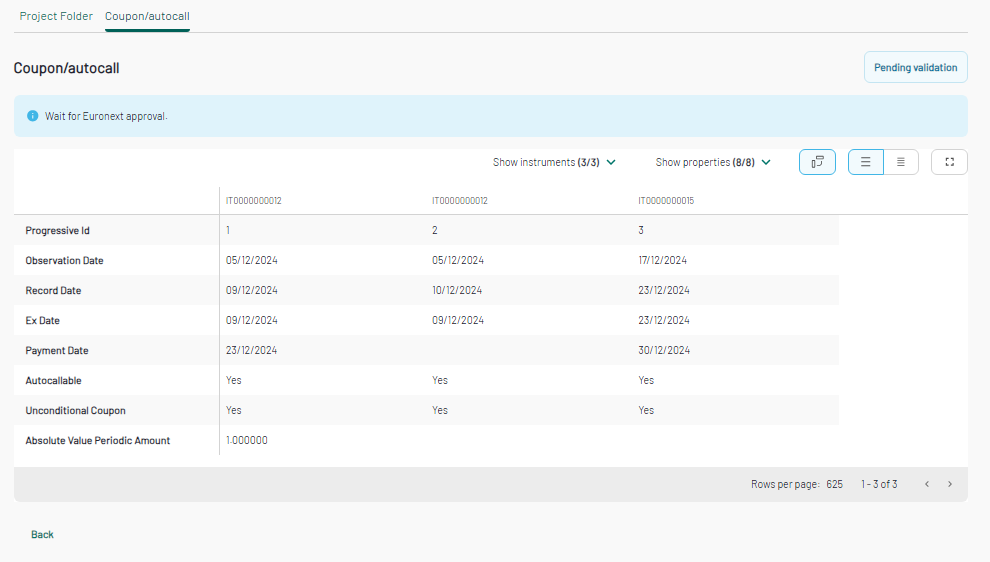
Once all the relevant information about the coupon have been provided, all the checks are successfully performed and the Ex Date calculated, click on the "Submit" button to send the coupon to Euronext for approval. A confirmation pop-in will be displayed to confirm the submission.
Upon submission, a light blue banner will be displayed on the Coupon/autocall page with the following message: "Wait for Euronext approval." and the Coupon status will move from "Upload" to "Pending validation".
Coupon/autocall table upon Euronext Rejection
When Euronext user rejects the Coupon/autocall, a red cross will be displayed near the coupon tab, and a red banner will report the following message: "Euronext rejected the submission". The rejection message and the message left by the listing operator will be available, detailing the name of the listing operator who has rejected the table.
The status of the coupon table will move from "Pending validation" to "Rejected"
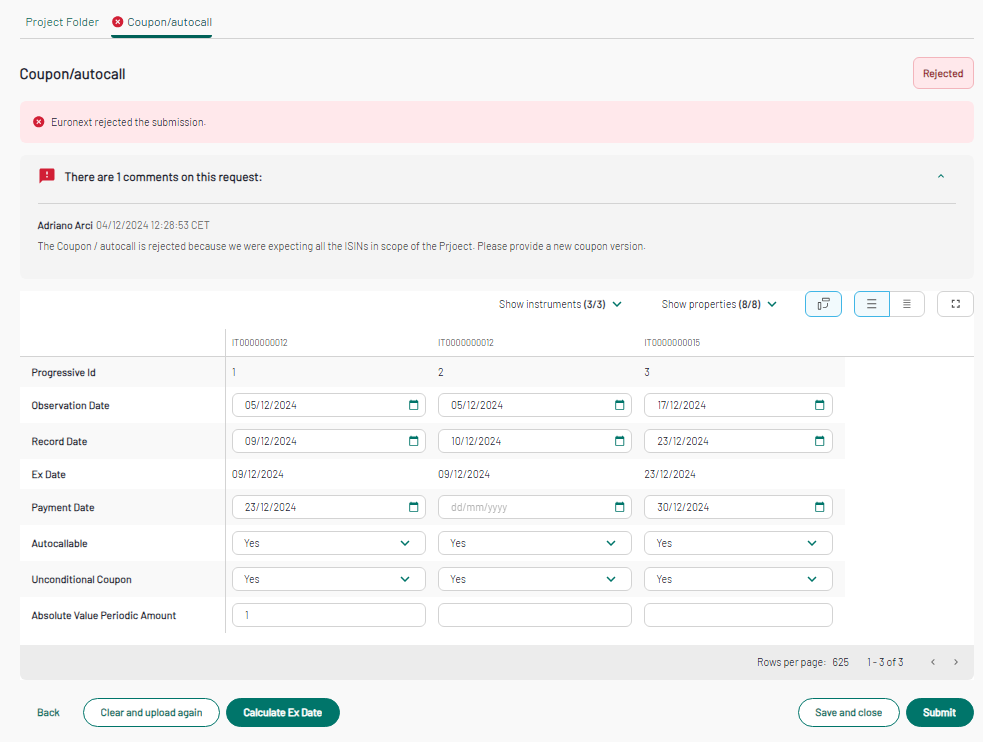
Upon a Euronext rejection, you can:
1. Either "Clear and upload again" the coupon plan, uploading a new .csv generator (the previously rejected information will be overwritten with the new upload),
2. Or manually edit the fields that need an update.
When all the modifications are made, click again on the "Submit" button to send the coupon to Euronext for review and validation. Upon click on submit, a light blue banner with the following message is displayed: "Wait for Euronext approval".
Coupon / autocall table upon Euronext Validation
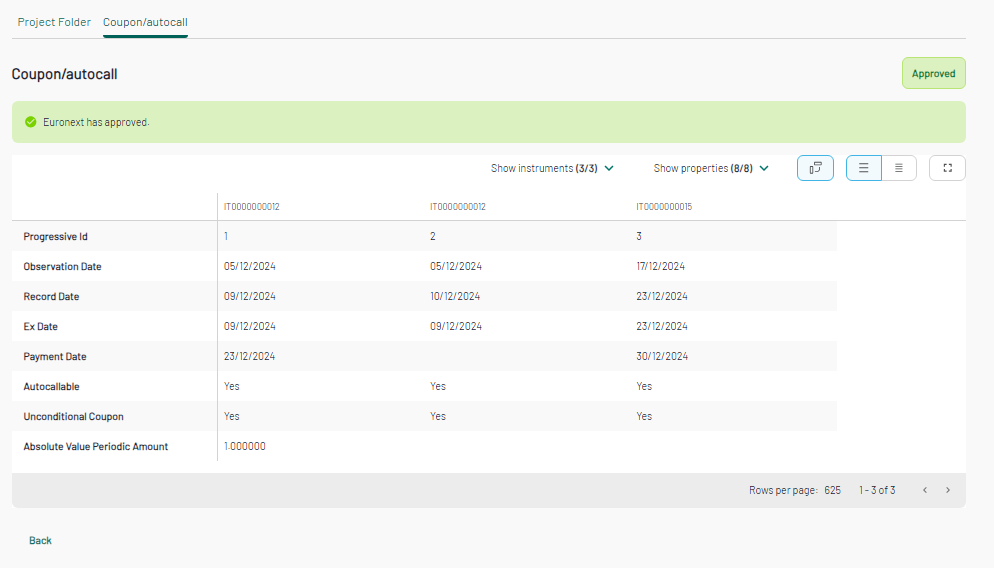
When Euronext has validated the Coupon / autocall table, the status will turns into "Approved" and the table will be in read only mode. Only the "Back" button is available and by clicking on it you will get back to the Project Folder.
